So sorry for my sudden departure from blogging!!! I have taken on many new and exciting challenges and changes. I am now a full time stay at home mom and full time student. It's taken a lot of organization, drive, and help from S, who I couldn't have done all of this without.
Also in the post all opinions are my own, I am not being paid for anything in any of the links.
I am such a newb at the whole staying at home thing so I thought blogging about all of our adventures, successes, and even the failures might help others out there too!
So to start I am attempting, yes attempting, to do preschool with L who will be 4 next month (I can't believe it). So far I would rate the efforts as mildly okay. Our first day we just ran through some printables that you can really find anywhere, I have a bunch linked on Pinterest here. L lost interest after the fifth worksheet.
We have ventured out of the house and found some really great places! The first one is the open gym in Apple Valley. It wasn't too crowded, a tiny bit cliquey (but it was also our first time and I'm not the type to introduce myself cause I'm a chicken, I let my kid basically do it for me.), LOTS of equipment to use and overall a fun time. You can also read more about it here.
The BEST we have found has been Skyzone in Oakdale. The toddler times on Tuesdays are awesome! It wasn't busy at all when we went and the kids could bounce around and stay in the foam pits as long as they wanted, which for L was "awesome". It is $6 and the first time you go you have to purchase special socks for $2.50, but it was so worth it! As a parent you are able to purchase your own socks so you can walk in between the trampolines to get to the kids if need be. You can also pay to jump your self, which I did not do. The best part is you can reuse the socks. I just keep ours in a gym bag we bring with and put them right back in when we are done. If your child loves staying in the foam pit like mine a few tips: 1) have them wear something that will not pill because you will end up with a lot (or obviously something you don't care if it does), 2) I will probably end up replacing his socks after the 3rd time as the pill as well and my OCD can't handle it. There are other times for older children as well (we haven't gone yet so I can't say if they are busy or not), will post link on both times. There is dodge ball there as well and thankfully most of the children are fairly young so they aren't pelting each other with the balls. Speaking of which, during times with multiple ages some kids throw harder than others and I had to warn mine that he may get hit with the ball, but he insisted on going (in case you're curious, he got hit with a ball. Thankfully he just gave the kid a look like what the heck and moved on.). You can read more about Skyzone here.
So far that has been the past month for us. I'm hoping to get in at least a post a week so come back next week!
As always any comments leave them below and thanks for reading!

Wednesday, January 31, 2018
Monday, January 12, 2015
Pancake and Jar Baby Food Finger Pick Ups

L has finally really started to get into finger and table foods lately. Which is great, except for the fact I have half a shelf of jarred baby food in my pantry. One day while making L pancakes for breakfast I decided to try adding baby food to them. It was a success, he gobbles them up even more with the added flavors.
All I did was add pancake mix (or you can make your own) and the jarred baby food (3.5 to 4 oz. size) to a bowl, then slowly add water. You want it to be just a bit thicker than you would normally make the batter. They turn out nice and fluffy. Once they have cooled off I just rip them into quarter sized pieces and place them on L's tray.
Another idea I have found that works to use up the jarred food is adding it to instant oatmeal. We buy the fruit flavored kind so I just add the jarred fruit to the oatmeal and a teaspoon warm water and mix. You could also use plain oats if you don't like or have instant oatmeal.
Have additional ideas? How did you use up your jarred food? As always share your ideas or thoughts and thanks for stopping by!
Monday, January 5, 2015
Countdown to a Dr. Seuss Party!


Beg, Borrow, Steal She has so many cute ideas, I can't wait to get started creating!
The next I'm going to share are pictures, that I saved months ago and of course didn't save where they came from or I would share that info. If you know where they are from please share in the comments.


So many things to make, I can't wait! Stay tuned to see each decoration, project and hopefully not any fails.
As always feel free to leave some comment love and thanks for stopping by!
Wednesday, December 31, 2014
Bookcase Revamp
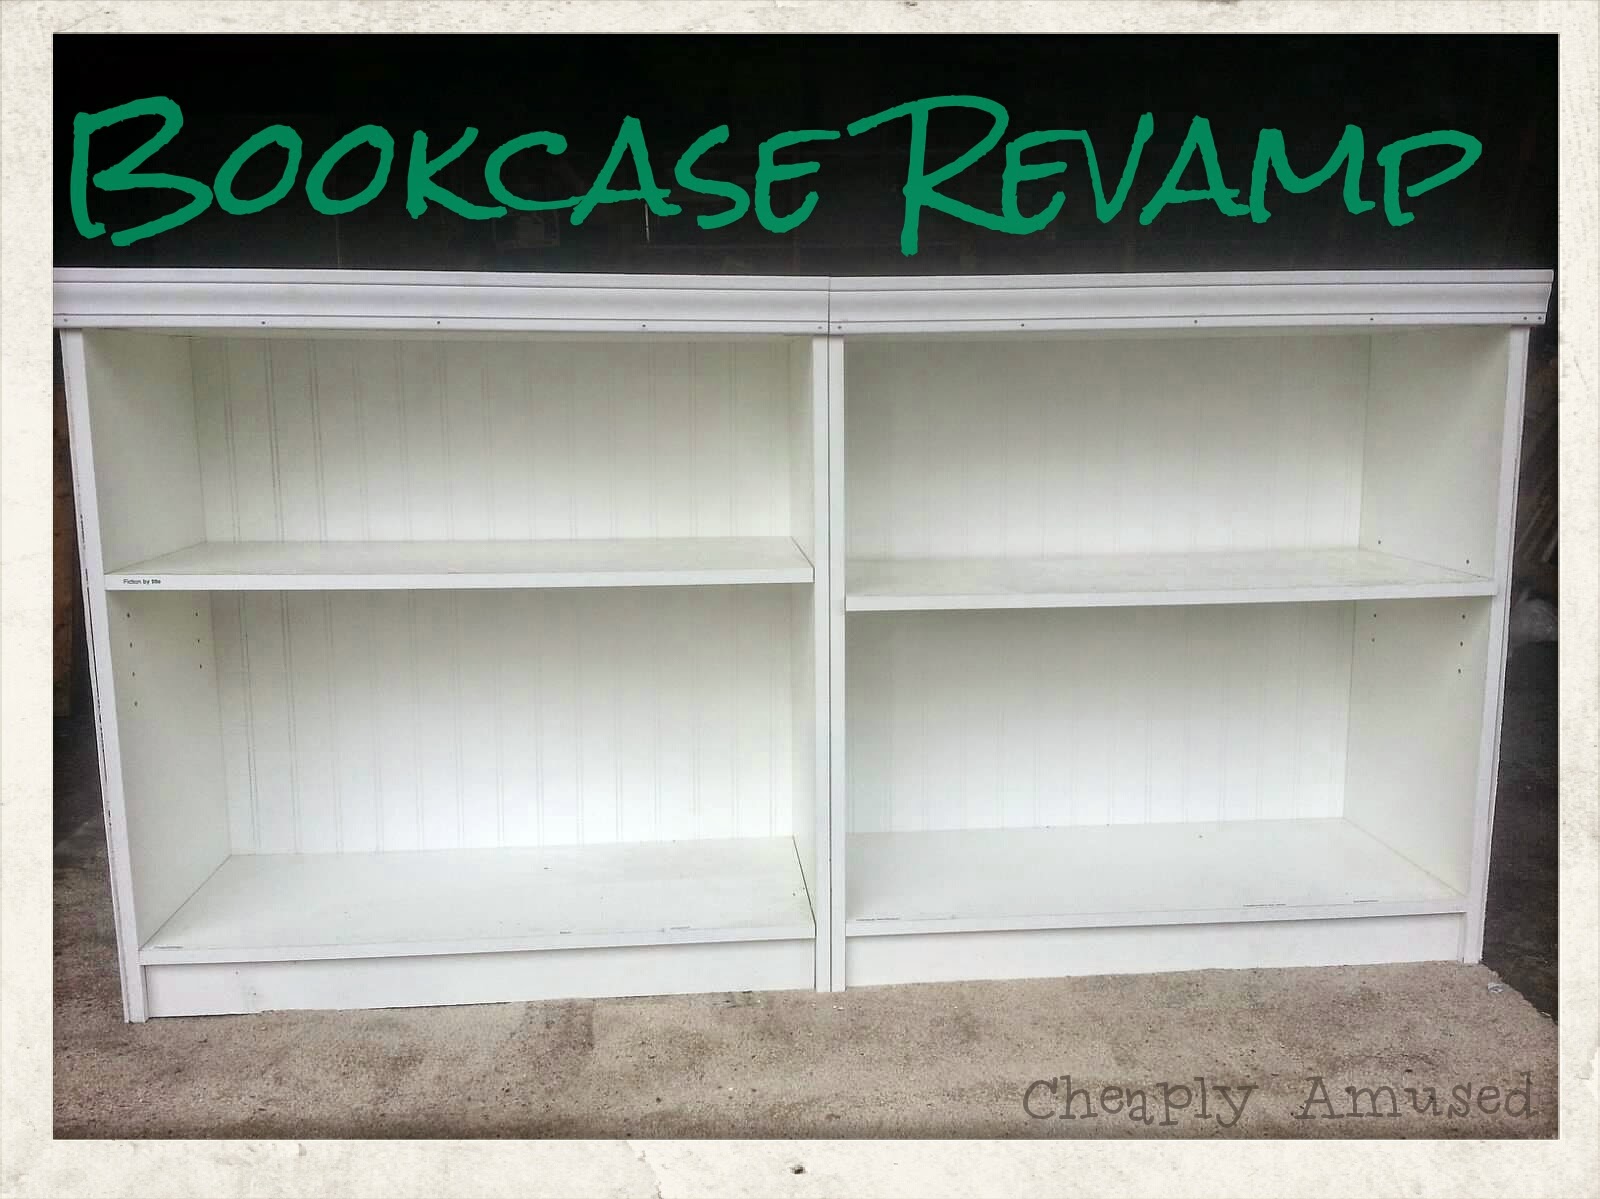
I did this project over a year ago, but found the pictures from the day we finished them and thought I would share.
These started off as cheap bookcases from Menards and when I saw the bead board panels I knew it would be perfect for this project.
The best part is that the bookcases were starting to get shaky due to lack of stability with the cardboard they include with the bookcases, so the bead board fixed that.
I could have gone around the whole bookcase with the molding, but I planned on keeping them together next to each other.
For this project you will need:
Bookcase(s)
Bead board Panels large enough to fit the back of the bookcase
Molding
Nails
Paint
You will want to cut the panels to size for your bookcase, making sure you leave the full edge so you can nail the panel to the bookcase.
Before you nail on the panel you want to paint it first, mine were obviously painted white but I often want to go back and add a pop of color. This is always an option too.
The same goes for the molding, cut to size then paint.
Once the panel(s) and molding are dry nail the panel to the bookcase. Since this is more sturdy than the cardboard you don't have to use quite as many nails, I went every 4 inches making sure to get the nails centered on the edges.
You can nail the molding on or use a wood glue. I nailed mine on to make it more stable when moving. Depending on the molding you select you may have to adjust it so the front of the bookcase and the back of the molding are flush.
Take a step back and admire your handiwork! You can do some touch up with the paint and cover up the nails if you like at this point too.
I loved this project! It was fast, easy and pretty cheap to do and it looks great.
I originally had them out in our living room, but a couple months ago moved them to my bedroom to reduce the clutter of the living room. They are still sturdy as ever and look great where ever I put them.
As always let me know your thoughts, feelings or even share your own handiwork. Thanks for stopping by!
Linked on:
Monday, December 29, 2014
DIY Christmas (or anytime) Gifts for Dad

S loved getting these from L for Christmas and they were fun to make as well! S actually saw the idea for the butt print on Pinterest and made a gift request thinking I would never do it. Well I proved him wrong.
We'll start with the easiest (surprisingly) one first. The butt print. My mom was shocked I did this and that I actually used L's butt, but it was actually quite fun. Had I used one solid color it would probably have shown up better but (pun intended) I wanted it to be festive.
You will need:
Paint of your choice, I used acrylic.
Something to put the paint on that is butt sized. I just used a paper plate.
Card stock or paper
Paintbrush if you plan on painting the words.
WET WIPES!!!!! or washcloth

I wanted it to be festive so I spread red for one cheek and green for the other on a paper plate. Then got L down to his birthday suit. It was only slightly difficult to get him to sit down since he's more into trying to stand these days. Plus when you add in him sitting on something squishy, that doesn't help either.
I made sure to do all of this very quickly and was going to be satisfied with the first print I got. I sat him down in the paint then quickly moved him to the card stock. Once the print was done I moved him face down to a towel to get him cleaned up quick.
I used wet wipes but you could use wash cloths. Really make sure you are getting all the paint off since their skin can be sensitive, especially on the bum. He also got a bath once we were all done but the wipes worked really well for the time being.

The perfect butt print, but I'm a little biased.

Once the print was dry and L was all squeaky clean I painted on the words using a small paint brush. You can always adapt it to whoever you are giving it to as I did.
Ninja Turtles Handprint
You will need:
Card stock or paper
Paint (Green, Purple/Red/Orange/Blue, Black and White)
Paintbrush(es)

I actually managed to get two good handprints from L with green paint. I was originally going to make multiple superheros for this project, but two green handprints was all I was getting out of him that day. So I worked with what I had. I had to fill in a tiny bit on one of the handprints since two fingers didn't really show up. I just used a small paintbrush and filled it in using very light strokes.
Once the hands were dry I painted on the masks and the mouths. I did two coats of paint for the masks since I really didn't want to see the green underneath.

The eyes and lettering were last. I didn't want to cover his handprints too much so I left the orange squares (like in the original idea) off.
I would be lying if I said L really liked making them since by the time we got through the two handprints he was done with all these art projects, but I really think they both turned out great and S loved getting them!
As always let me know what you think and Thanks for stopping by!
Linked on:
http://sandandsisal.com/2014/12/inspire-monday-40.html
http://blog.pioneermomma.com/
Saturday, December 27, 2014
Handprint Bowl

I'm so excited to finally be able to share all the homemade Christmas gifts L and I made this year! These did not turn out at all how I imagined. I originally saw the idea on someone's Facebook post, but it only linked to a picture. So I thought I could just recreate it, I was wrong. Although it doesn't look like the original idea I still love it.

I still would love to know how they made this one!
Here is how I made mine:
You will need:
Flour
Salt
Water
Paint if you so chose
Gloss Modge Podge

I mixed up my salt dough using 2 cups of flour, 1 cup of salt, and 1 cup of water. I ended up adding another 1/2 cup of flour since it was so sticky. I ended up splitting the batch into three equal sections and putting two in a Ziploc bag in the fridge. This seemed to firm it up a bit too.

I pulled a smaller section from the one I was working with. I rolled it out onto a floured surface and worked in some more flour into the dough. I rolled it about 1/4 inch thick (probably should have made it a bit thicker) into a circle. I placed the circle on a plate so L would have a firm surface to press his hand into the dough and it was easy to move from his highchair to the counter.

Once I had his handprint in the dough I cut it out using a butter knife. Since the dough was still fairly sticky this was not that easy and I had to round out the edges of his fingers by hand. After getting two handprints out of him I knew I was not getting anymore. So I decided to trace the original handprint on card stock and cut out the rest from that.

Once I had my template I cut out about 8 more handprints.

I used a Pyrex bowl and sprayed the outside with Pam before laying his first handprint in the middle of the bowl. I then went around the bowl pushing the handprints into the middle and each other. Two of the handprints the fingers got stretched out for whatever reason and another the dog apparently wanted to eat two fingers off of so I had to reattach those. I smoothed out the bottom using my finger and some water to make sure the joints would hold. I preheated the oven to 200. I then placed the bowl on a cookie sheet (I have yet to full get the stains off but it is actually clean) and baked it for 2 hours.
I let it cool on the bowl for about 15 minutes then took it off the bowl and let it fully cool on a plate.

The handprint in the middle is my favorite part! I just applied Modge Podge gloss to the whole thing but it could be painted with regular acrylic paint and then a gloss applied to it if you like. Again it doesn't look like the original idea, but I still like it.
Let me know your thoughts, ideas, if you have a question, etc. Thanks for stopping by!
Linked at:
| http://www.the-chicken-chick.com |
| http://www.dwellings-theheartofyourhome.com/2014/12/amaze-me-monday-91.html |
| http://itssoverycheri.com/2014/12/28/party-time-12-28-2014/ |
| http://diyshowoff.com/2014/12/28/diy-party-33/ |
| http://www.create-with-joy.com/2014/12/inspire-me-monday-week-156.html |
| http://www.keepingitsimplecrafts.com/ |
| http://www.flourmewithlove.com/2014/12/mix-it-up-monday_28.html |
Tuesday, December 23, 2014
Before and After Pantry Makeover
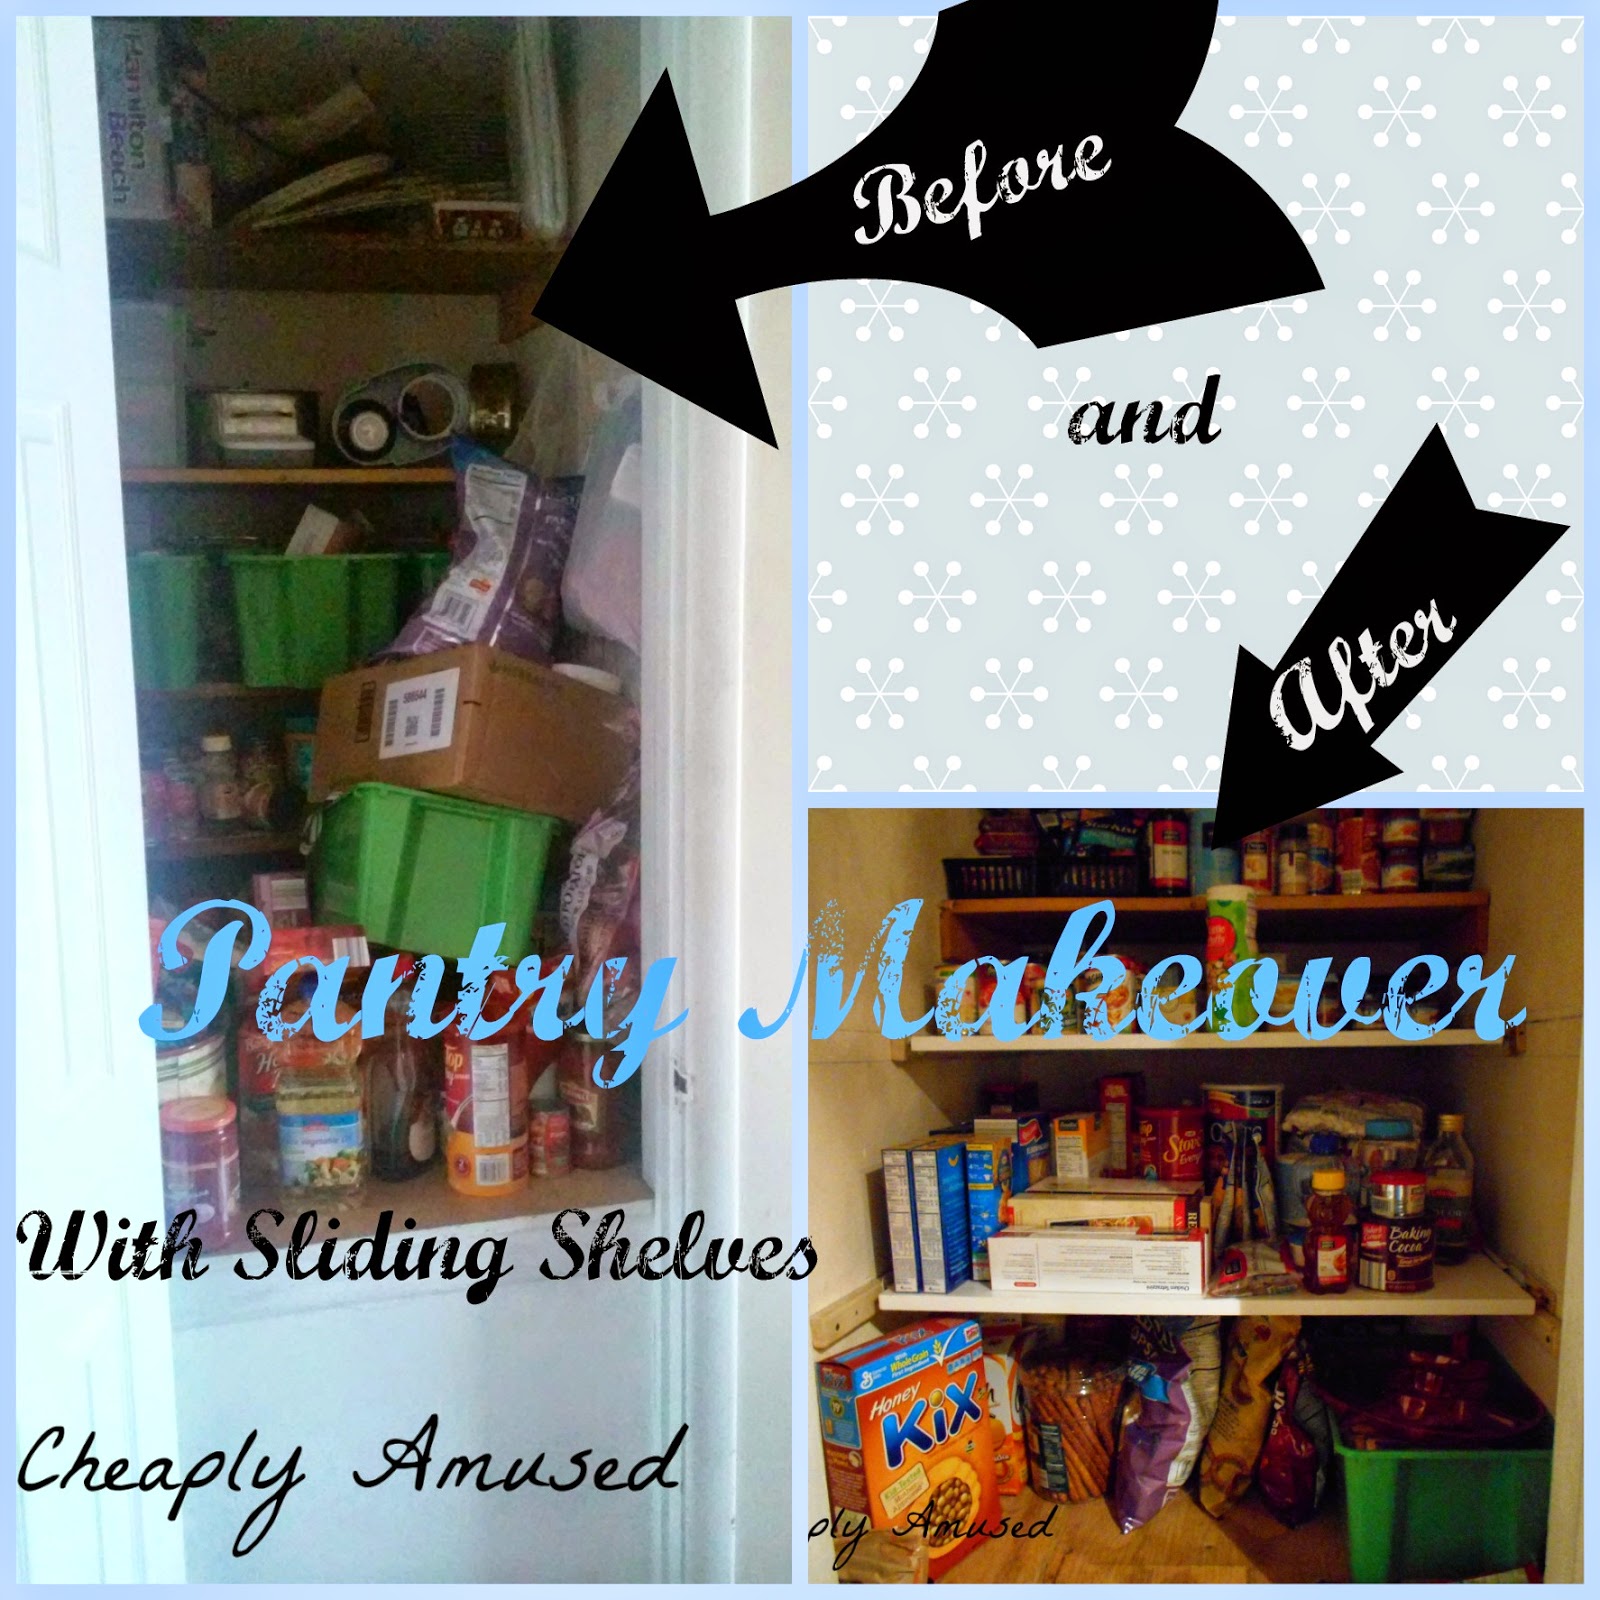
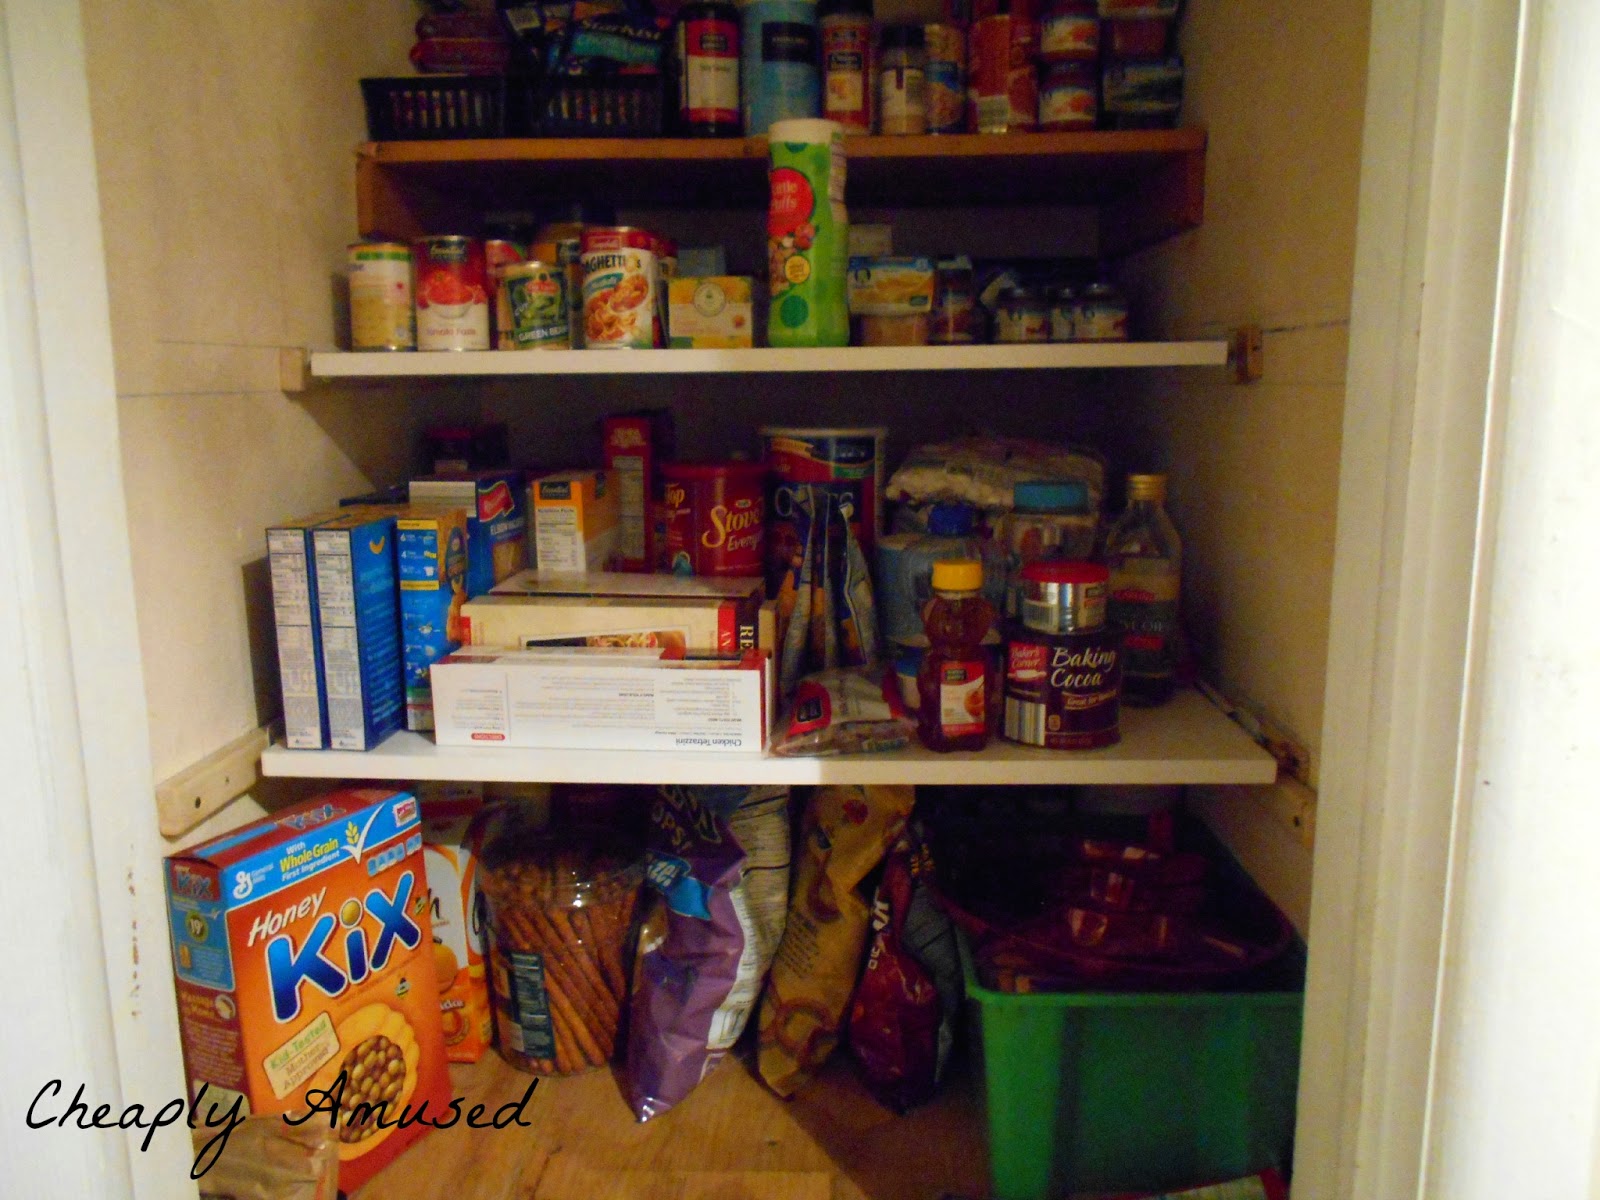
I really need to stop looking for things. Or maybe keep looking since my house is getting more and more organized. This time it was honey that I tore my pantry apart and decided something had to be done about it. I'm actually beyond excited to share all the problems and the amazing finished pantry with you though. I'm pretty proud of the end result and the fact that I did it all by myself.
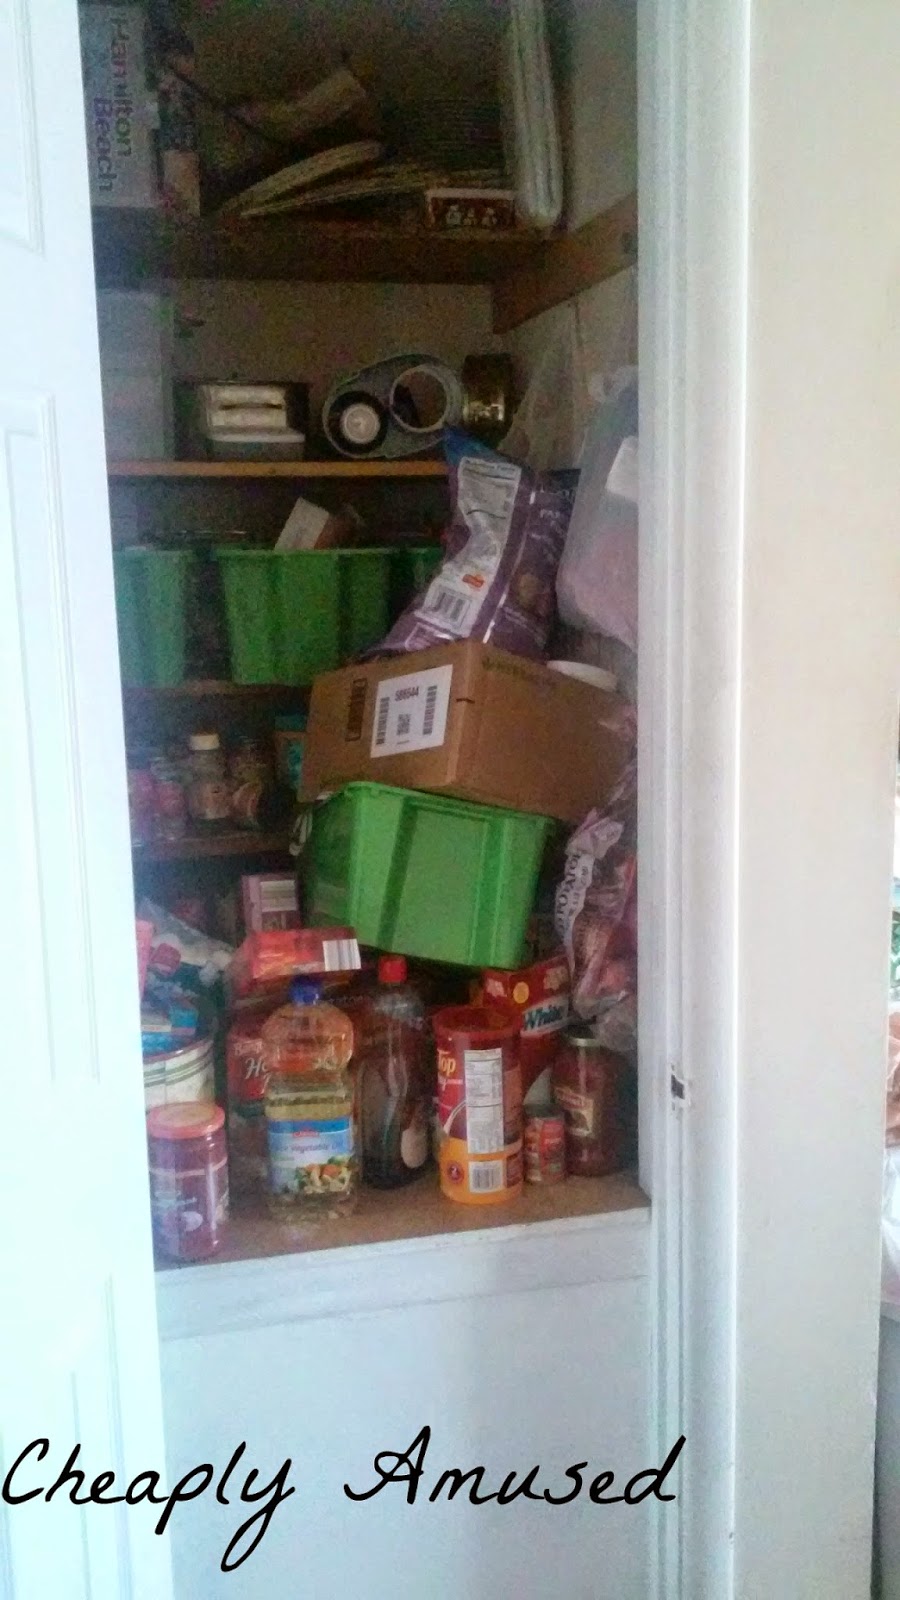
As you can see from the above, it was a hot mess. Things just got thrown in there, nothing had it's own place, you just couldn't find anything.
I have been dreaming about pull out shelves since we moved into the house. Because the pantry closet is over the stairs to the basement (hence the fact that it doesn't go all the way to the floor) the shelves would only be able to pull out to the door frame, but that was okay with me.
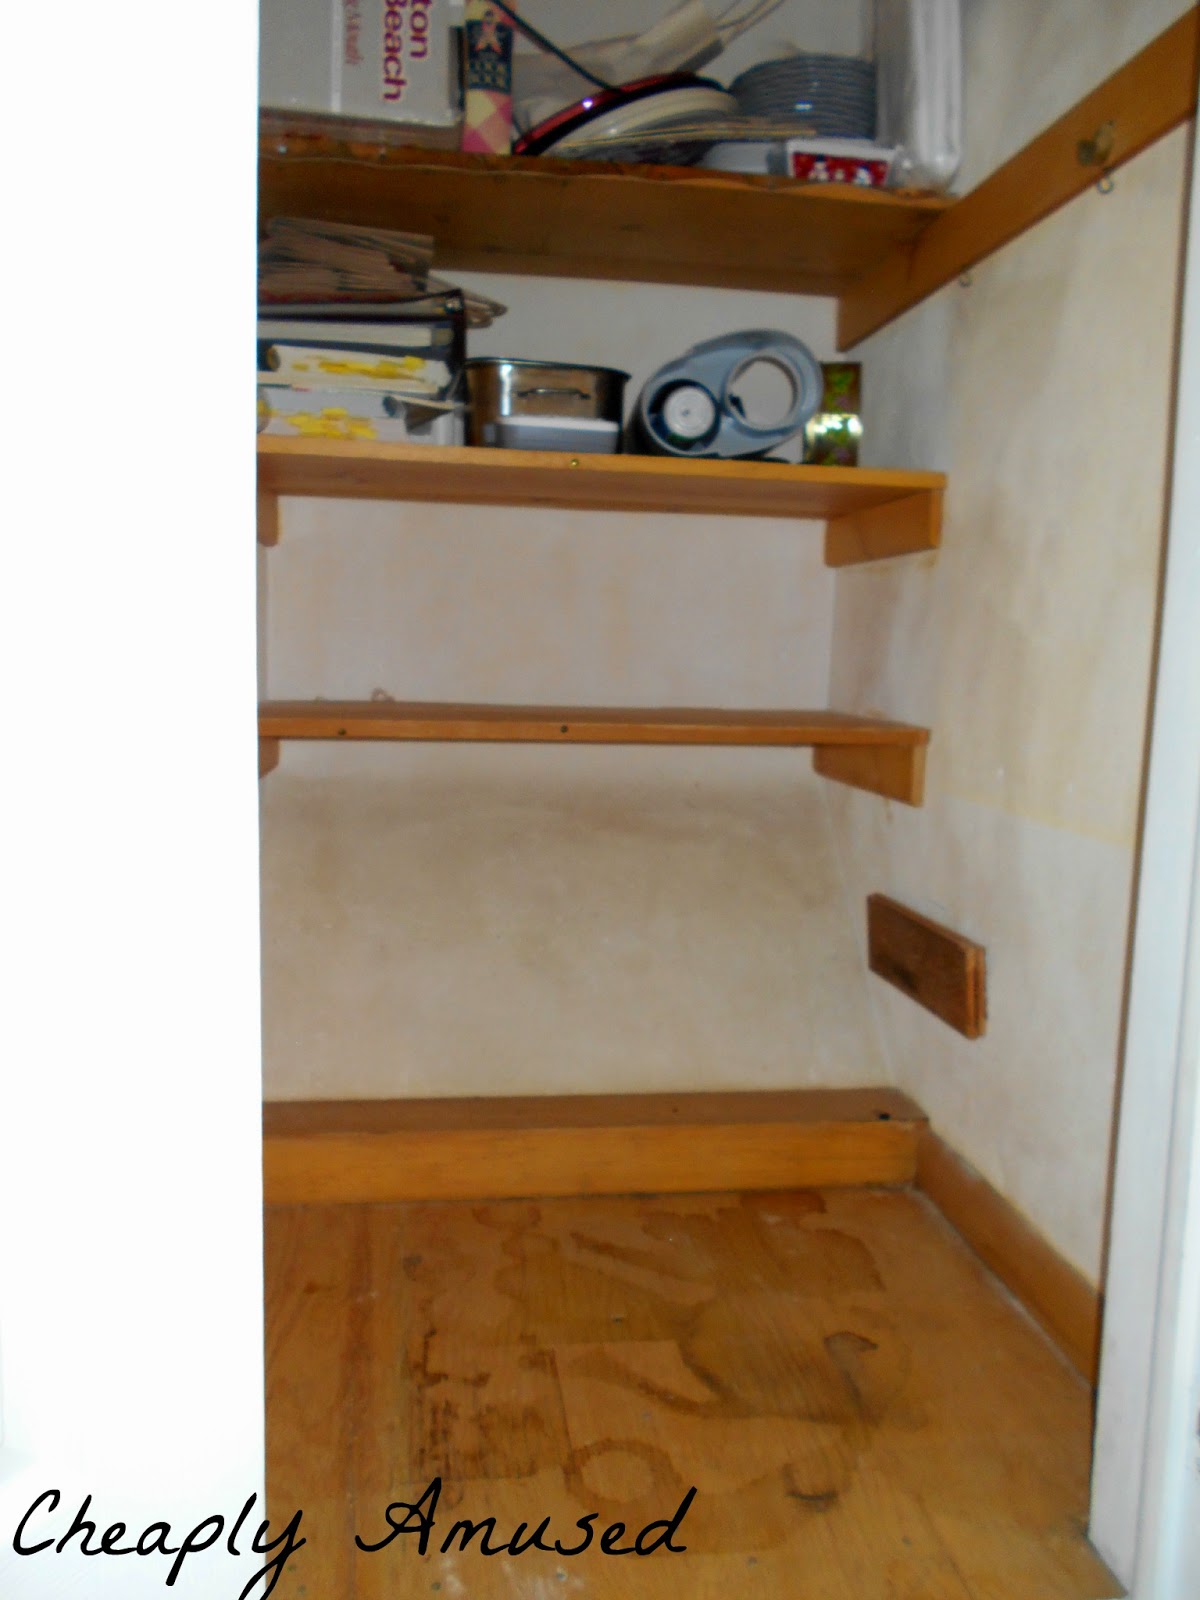
The closet is very deep and, as I soon found out, uneven. The width between the two walls in the back is shorter than at the front (Problem #1 on the Project). So I knew I would have to somehow even the width for the drawer glides to work. I measured multiple times both the front of the closet and the back and drew up my plan.
I had the drawer glides already and had some left over wood from a previous project so I was ready to get at it. I came to find out that the wood I had was way too heavy (Problem #2). So off to the hardware store I went, thankfully I had to go anyway to get wood to even up the walls.
I got:
1 White Shelf 8 feet by 23 inches
4- 1"x 2" Boards at 4 feet long
2 lathe pieces of wood
2 Drawer Handles (actually gate handles, they were the only ones I could find that you can screw in from the front.)
I had the hardware store cut the shelf down to 34" for the two shelves and will eventually use the left over for a stationary shelf in the pantry.
The difference between the front and back two walls was only 3/4" so I figured a small piece of the 1" x 2" at the front of the closet would work perfect (Problem #3).
I marked my lines level where I wanted the shelves to go, then lined up the drawer slides and marked where they would go. From my markings and the location of studs I put in my 1 x 2 piece where the front of the drawer slide would go. I just used 1 1/2" screws we had on hand and my handy dandy drill making sure I wasn't putting the screws in where the drawer glide screws would go.
Once I got the lower shelf's drawer glides installed, I put the shelf in to see if I would need to cut it down. I just needed to cut it down 1/4" inch. Bring on the circular saw (my favorite, it has a work light and laser level), I can feel the power in my hands as I right this. Oh wait, that's right my circular saw stopped working after one cut (Problem #4). Thankfully my mother is a gem and let me borrow hers.

Back on track I made my cut and put the shelf in. Fit like magic! Wooo Hooo my hard work paid off. Then I went to slide it. On one side it scrapped against the wall and was a huge pain to pull past an inch, but hey at least it's level. So I decide at this point to add a full length piece of 1 x 2 to the wall opposite the wall I already added it to, to even it up.
No more scrapping and slightly easier to pull out. I screwed the glide onto the shelf at that point. On to the next shelf. I repeated the same process for the second shelf, cutting out the middle man and just adding 1 x 2 on both walls. I felt very confident at this point that I had mastered the closet, so I screwed the glides on the shelf. Then tried to pull the shelf. It was so tight I had to use two hands just to get it out. Now after working on this for about 8 hours over two days I was tempted to throw in the towel and say well it's just going to be a little hard to pull. But as S pointed out when he came to check my progress, it would get even worse once I added food to the shelves. Trust me after lifting those shelves multiple multiple times in and out of that small space the first thing I thought was we'll just leave them empty. I knew I had to forge on. So I broke down and called my uncle to see if he could tell me why it wasn't working.
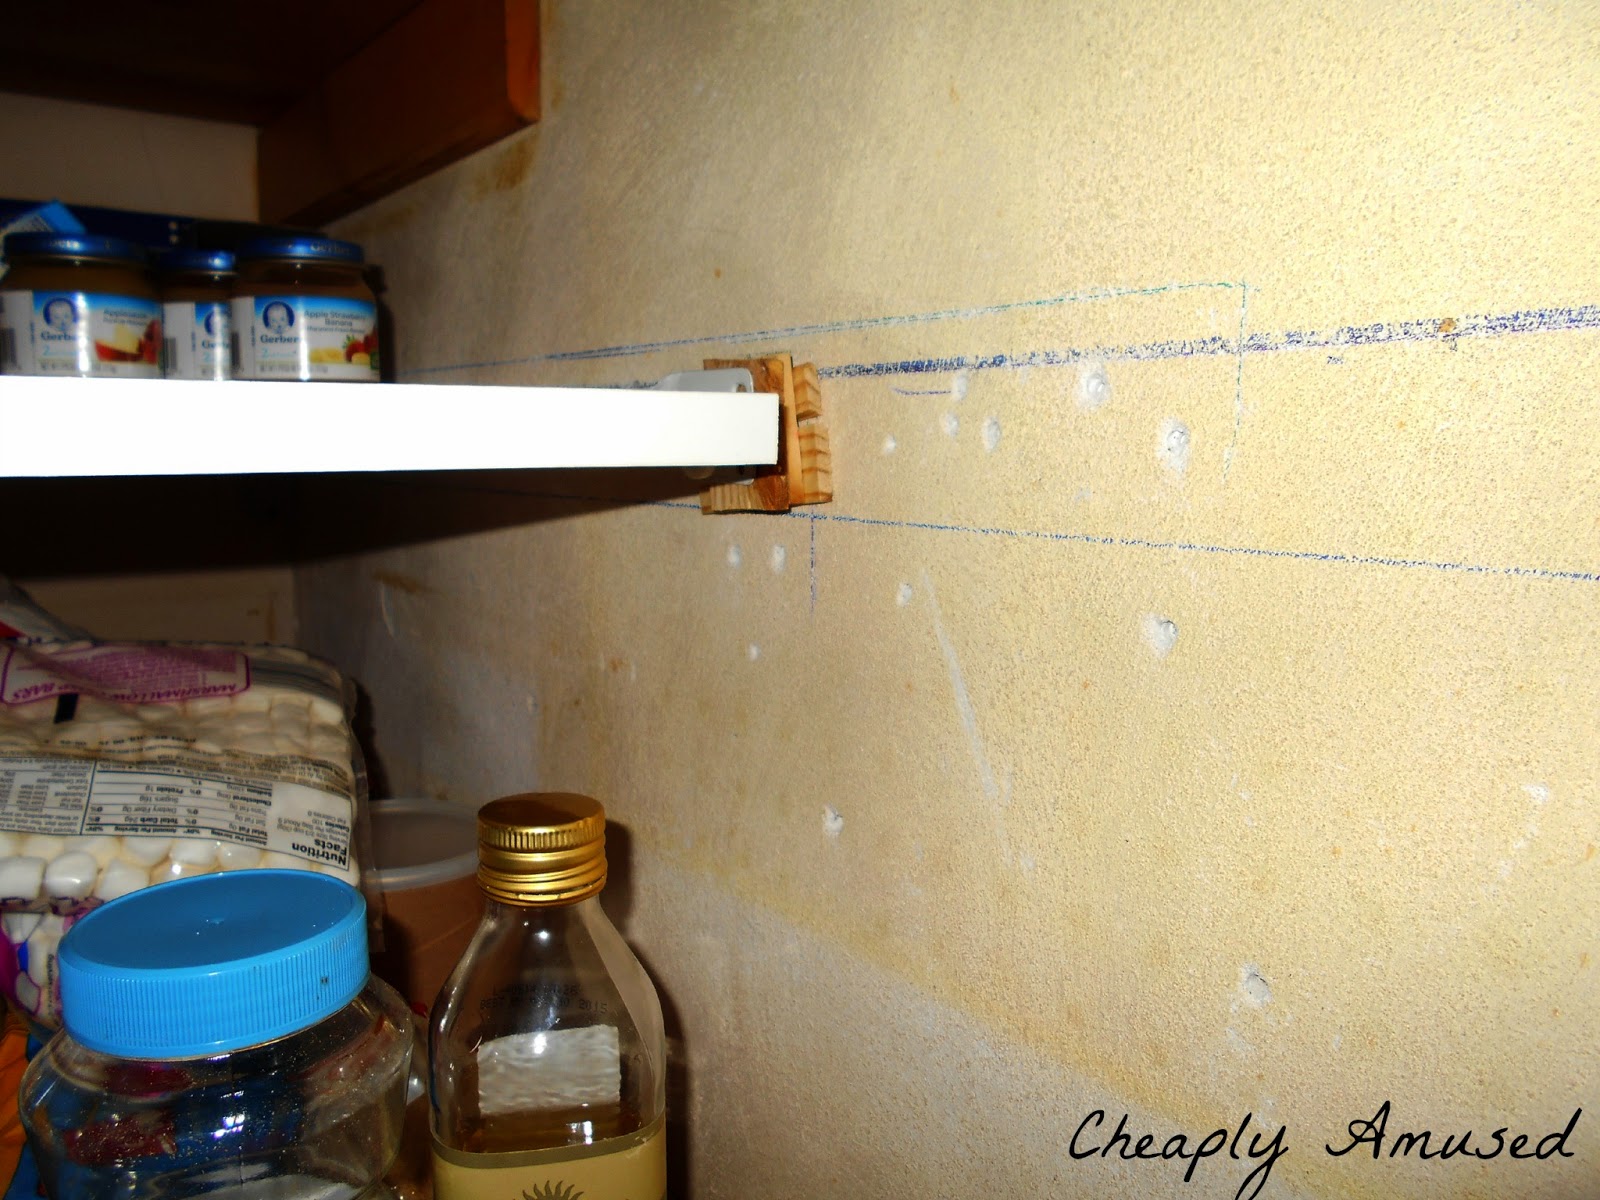
The 1 x 2 is too big was the answer I got. Phew not a huge thing. My uncle recommended using shims, but I already had the lathe pieces so I cut those down and put 3 in place of the 1 x 2 on one wall for each shelf. Always pre-drill the holes, especially when working with thin pieces of wood. If you don't they split and you may cry like I was on the verge of. Lesson learned there. Once I had them in on both shelves I held my breath and pulled. Smooth like butter.
Isn't she pretty. I think I will call her Patty, Patty the Pantry.
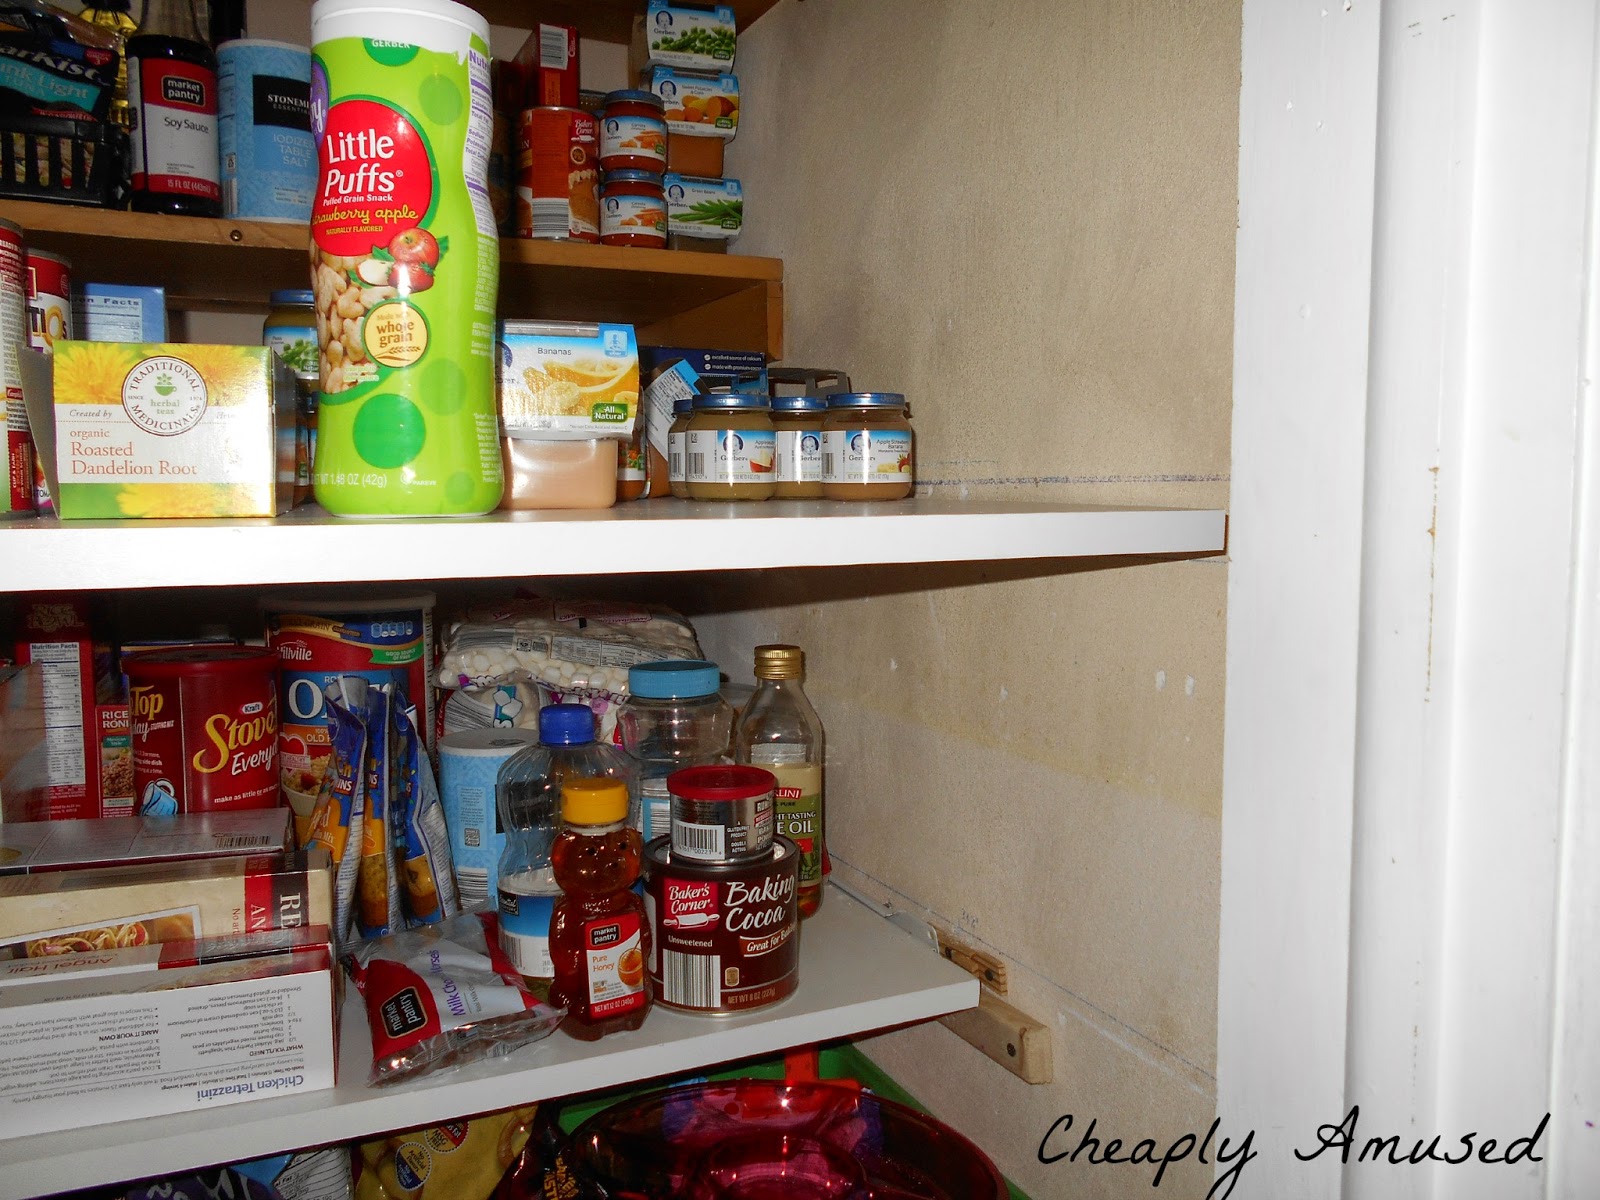

Just look at all of that usable space! Everything thing now has a place and I can find things so much easier now. Plus I cleared out some cabinet space and was able to better organize the kitchen cabinets.
Thanks for stopping by and as always let me know what you think, if you have questions, hate it, love it, let me know.
As featured on:

Linked on:
Subscribe to:
Posts (Atom)